A rectilinear RGBD image will help a lot in computer vision tasks, such as 3D reconstruction. This tutorial will illustrate how to capture RGBD data with iPhone, export the data to Python, and rectify the data. Code in this blog is available in this repository.
Capturing Photo with Depth Map
For iOS devices with a dual camera or a TrueDepth camera, they are able to provide depth data when capturing an image. However, the depth data is provided only when requested. This section will focus on capturing a photo with depth data using AVFoundation.
If you still don't know how to take an image with AVFoundation, some other tutorials will help, such as Capturing Still and Live Photos. Briefly speaking, to capture an image with AVFoundation, a capture session needs to be built and configured.
1 | captureSession = AVCaptureSession() |
The configuration includes the capture device configuration, input configuration, output configuration and handling, preview output, and capture settings. By adjusting some configurations in the session, the depth data will be provided along with the capture result. The rest part of this section will focus on configuring such a session.
Capture Device Configuration
According to Apple's document, builtInDualCamera and builtInTrueDepthCamera are able to provide photos with depth maps. To make it possible for your pipeline to output a depth map, you need to select one of these two cameras when instantiating your AVCaptureDevice.
Note: Although both cameras are able to output depth maps, the two cameras are based on different principles.
builtInDualCamerawill conclude the depth data using binocular stereo vision algorithms, which seeks feature points in the two images captured by two cameras and conclude the depth. This algorithm will be easily affected: darkness or textureless images will cause problems for this algorithm.builtInTrueDepthCamera, on the other hand, is a structured light system, like Kinect. It projects infrared laser dots to the object, then analyzes the pattern of the projected dots to conclude the depth. In brief, depth maps provided bybuiltInTrueDepthCameraare much more accurate than it provided bybuiltInDualCamera.
1 | imageCaptureDevice = AVCaptureDevice.default( |
Input / Output Configuration
The following code will help to configure the input and output of the capture session. Whenever you need to change the configuration, remember to call beginConfiguration() and commitConfiguration() before and afterward.
1 | deviceInput = try! AVCaptureDeviceInput(device: imageCaptureDevice) |
By setting isDepthDataDeliveredEnabled to true of the photo output, you are one step closer to outputting the depth map.
1 | captureSession.beginConfiguration() |
Video Preview Setup
Theoretically, you can start capturing the image with such a configuration. But no one wants a camera which they can't see anything when they are taking a photo. Thus, we need to set up a preview layer for the session so that people will see what will be captured before they press the button. You can instantiate the preview layer of the session with the following code.
1 | previewLayer = AVCaptureVideoPreviewLayer(session: captureSession) |
Then, by inserting the layer into a UIView object and adjust its frame property, you can make the preview layer visible.
1 | override func viewDidLoad() { |
Running and Stopping the Session
The AVCaptureSession is a resource-consuming task. By starting and stopping the session in proper time, you will prevent wasting extra energy on the cell phone. After starting the session, you should be able to see the preview working.
1 | override func viewWillAppear(_ animated: Bool) { |
Capturing the RGBD Data
When the user (or, more likely, you) press the capture button, it's time to tell the capture session to capture an image. This step needs you to pass an AVCapturePhotoSettings parameter which specifies the setting of this capture. Setting isDepthDataDeliveryEnabled to true will let the capture session passing you the depth data. The raw depth data contain lots of holes where the depth data is not available. Setting isDepthDataFiltered to true will tell the system to fill those wholes. Of course, you can set it to false and choose your own algorithm to handle the holes. Just mind the representation of those holes.
1 | let photoSettings = AVCapturePhotoSettings() |
You can get the result of the capture by delegating AVCapturePhotoCaptureDelegate. The processed result will be passed to photoOutput(_:didFinishProcessingPhoto:error:).
1 | func photoOutput( |
Data Type Convert and Export
You are able to capture an image with a depth map now. However, the data is still represented in Apple's own format. If you feel better working with other frameworks such as Python (like me), exporting the captured data will be a good idea.
Export the Image
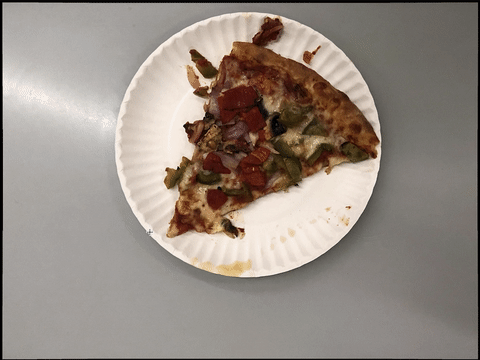
Compared with the depth map, the image itself is not hard to obtain. by calling fileDataRepresentation() or cgImageRepresentation()!.takeUnretainedValue() of the AVCapturePhoto object, you are able to access the jpeg / HEVC data or CGImage object of the captured image. Then the data is ready to be shared. You can save the data to the user's album or use other methods such as presenting UIActivityViewController or posting the data to a server to share it.
Export the Depth Map
Compared with the colored image, the depth map is a little bit hard to read since it's not actually an image but a 2-dimensional array. The AVCapturePhoto's depthData property is used to store the depth map related data, while the depthMap property of AVDepthData is used to contain the depth map itself, which is represented as a CVPixelBuffer object. There are some other properties of AVDepthData that help us rectifying and reconstructing the RGBD data, and they should also be recorded.
Convert Depth Map
My original thought is to directly export the depth map to a JSON file format. Unluckily, the CVPixelBuffer object does not conform to Codable protocol. Another thought is to read the data one by one and write them to another array, then wrap it into a JSON file. This sounds a little stupid, but it works.
The implementation is to get the pointer of the CVPixelBuffer, then cast the bits to Float32, and read the values one by one. Before casting, you will need to use the following line to convert the data in the pixel buffer to 32 bit values. If not, the data might be 16 bit, and it could be disparity values, not depth.
1 | let convertedDepthMap = photo.depthData!.converting(toDepthDataType: kCVPixelFormatType_DepthFloat32).depthDataMap |
And here is the implementation that converts a CVPixelBuffer object containing depth data into a Float32 array.
1 | func convertDepthData(depthMap: CVPixelBuffer) -> [[Float32]] { |
Convert Calibration Data
The camera calibration data will provide import calibration data. Here are some fields that I'm interested in.
intrinsicMatrix: This matrix will provide information about the optical center and the focal length camera.pixelSize: The size of the pixel. This is useful since values inintrinsicMatrixare expressed in pixels.intrinsicMatrixReferenceDimensions: Since the size of the depth map and the colored image are different, it will be useful to know which size are the reference coordinate and convert the related data if necessary.lensDistortionCenter: Useful when correcting the lens distortion.lensDistortionLookupTable: This is used to provide the necessary magnification values when rectifying a distorted image.inverseLensDistortionLookupTable: This is used to provide the necessary magnification values when distorting a rectified image.
The above properties except lensDistortionLookupTable and inverseLensDistortionLookupTable are obvious to be converted to float or float array values. For these two properties of type Data, they are actually an array of Float and can be converted to Float array with the following method.
1 | func convertLensDistortionLookupTable(lookupTable: Data) -> [Float] { |
Data Wrapping
With the help of JSONSerialization, it's possible to wrap the depth map and calibration data into a Data object, which can be decoded as a JSON string. In Swift, you can directly write the Data object to disk and get the URL, and then it's an open question for you to share the file. Here's a sample implementation of the data wrapper.
1 | func wrapEstimateImageData( |
Displaying in Jupyter Notebook
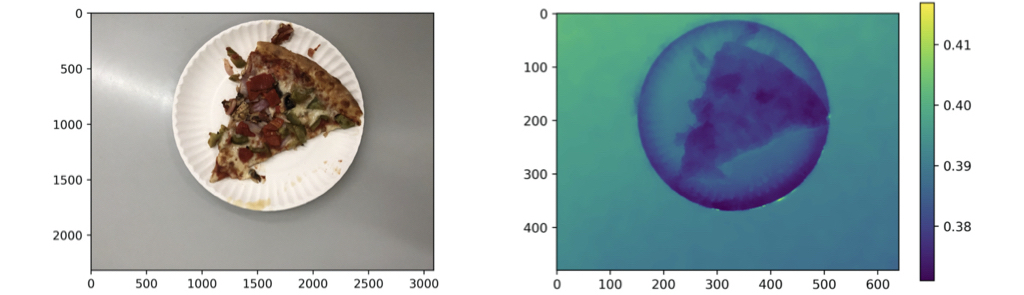
I choose to POST the image as a .jpg file and the wrapped depth data as a .json file to my server. To present the data you've got, using Jupyter Notebook is one of the easiest ways. You can extract the colored image and the depth map as numpy.array and visualize them using matplotlib.pyplot.
1 | with open('/path/to/file.json') as in_file: |
1 | image = np.array(Image.open('/path/to/file.jpg')) |
Rectify Distorted RGBD Data
Now we have obtained the colored image and the depth map, as well as necessary camera intrinsics. However, there's one thing that is not satisfied: the distortion. The colored image is distorted since they are not taken by pin-hole camera. The lenses will distort the image when they allow more light to come in. The depth map, in order to match the colored image, is also manually distorted by Apple. To improve the accuracy on computer vision tasks, both of them are supposed to be rectilinear, say, undistorted. Luckily, Apple has provided the necessary data to help us to undistort or re-distort the image: lensDistortionLookupTable and inverseLensDistortionLookupTable.
For a more detailed explanation, you should refer to WWDC 17 session: Capturing Depth in iPhone Photography. In brief, the lookup table provides the magnification along the radius of the image: the line from the distortion center to the farthest corner of the image. In order to compensate the distortion, we can use the lookup table to determine the original coordinate of the pixel and put them in the right position.
By passing lensDistortionLookupTable, this C method will help to calculate the distorted point position of a given point. It determines the radius of the image, the distance between the provided point and the distortion center (radius_point), calculates the magnification by linear interpolation values in the lookup table, and finally concludes the position after distortion using the calculated magnification. You can pass the inverseLensDistortionLookupTable to do the inverse calculation.
1 | double* get_lens_distortion_point( |
To rectify the whole image, you will need to create a new empty image. For each pixel in the new image, calculate the distorted position of the point, then fill the pixel with the value of the distorted position in the distorted image. This is a time-consuming step since you will need to iterate all pixels in the image, that is the reason why this method is implemented in C instead of Python or Swift. The implementation is as follows.
1 | double* rectify_image( |
Besides, you will want to write another method to free the allocated memory since the returned values are allocated but not freed in the method.
1 | void free_double_pointer(double* ptr) { |
Suppose your .c file name is undistort.c, the following command will compile the code to a .so file, which makes it possible for you to bridge this method to Python using ctypes.
1 | cc -fPIC -shared -o undistort.so undistort.c |
Finally, it's time to wrap the C method into a Python method. ctypes will help you to convert the data type when passing the arguments. Though Python is a dynamic type language, you have to be extremely cautious with data types here since you are communicating with C. The numpy array is type converted when passing as the argument since the image may not be of type double (for instance, the default dtype for the colored image is uint_8).
1 | undistort_dll = ctypes.CDLL('/path/to/file.so') |
By calling the Python method and pass the image as numpy array along with lensDistortionLookupTable, you are able to rectify the image. Note that the position of lensDistortionCenter refers to intrinsicMatrixReferenceDimensions. If your image size does not conform to it, remap the position of lensDistortionCenter accordingly.
It's more obvious to use a gif to compare the difference between the original image and rectified image.
Visualization
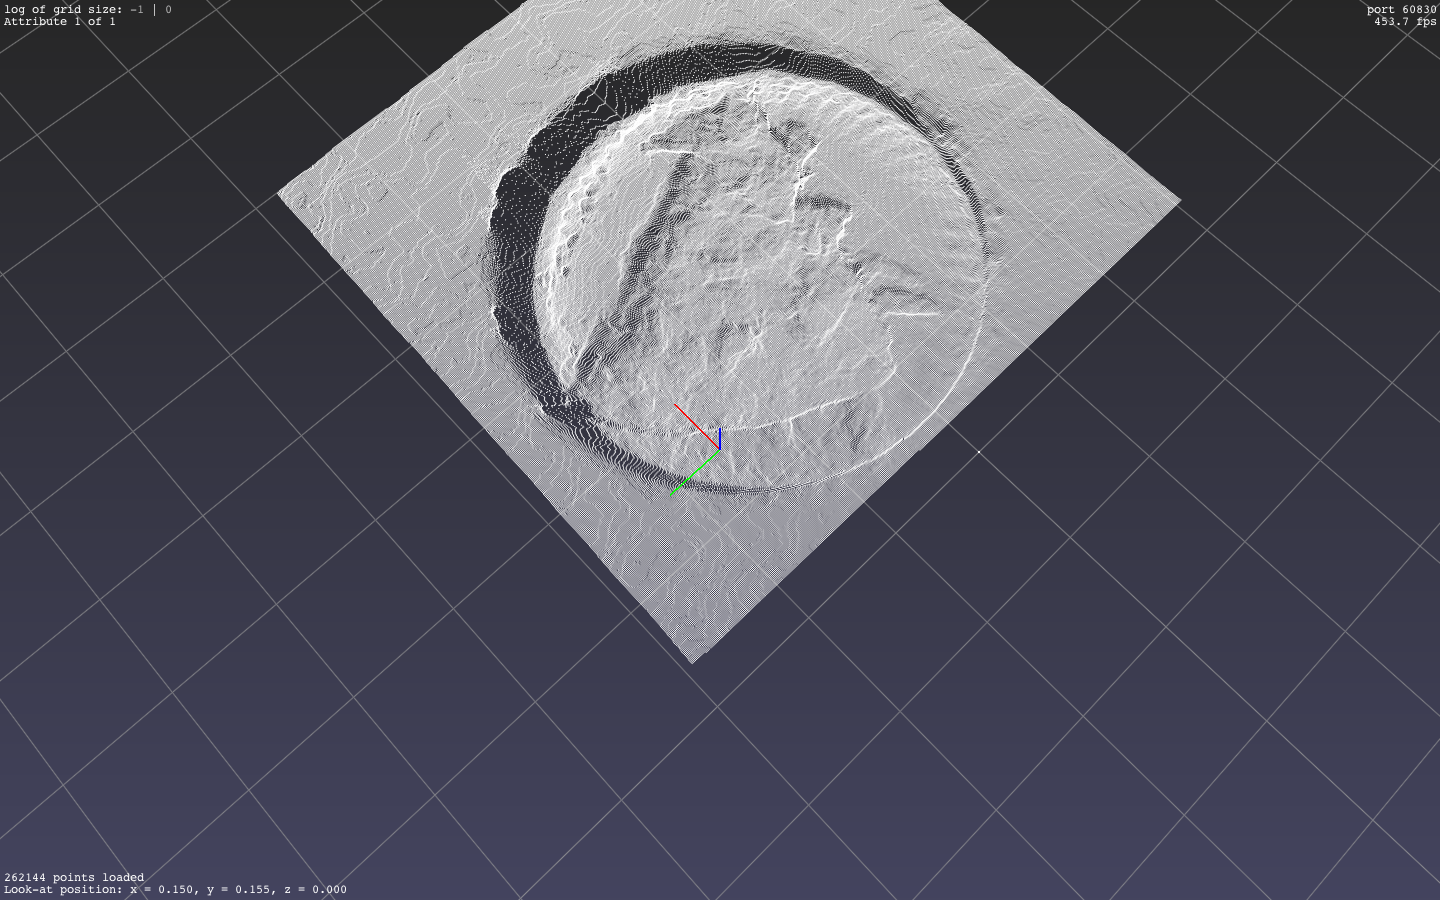
By making use of the rectified RBGD image as well as the camera calibration data, we are able to project the image into 3D space as a point cloud. This method is extremely easy to implement. Here, you will need the optical center coordinate and the focal length.
1 | def _get_3d_coordinate(row, col, fl, oc_x, oc_y, depth): |
By using open3d or pptk, you will be able to visualize the point cloud.